Habit Tracker
I had a pleasure of running a small workshop that introduced participant to basics of building devices with Raspberry Pico and Micropython. As a goal I’ve come up with a simple habit tracker gizmo - after completing some task you wish to track you press one of the buttons and the information is sent to Pixe.la service. You also get a colored square on the screen - the more repetitions given day, the darker the square gets.
Mind the code is not meant to be clean - it was rather meant to be “explainable” to users that don’t code.
Required components
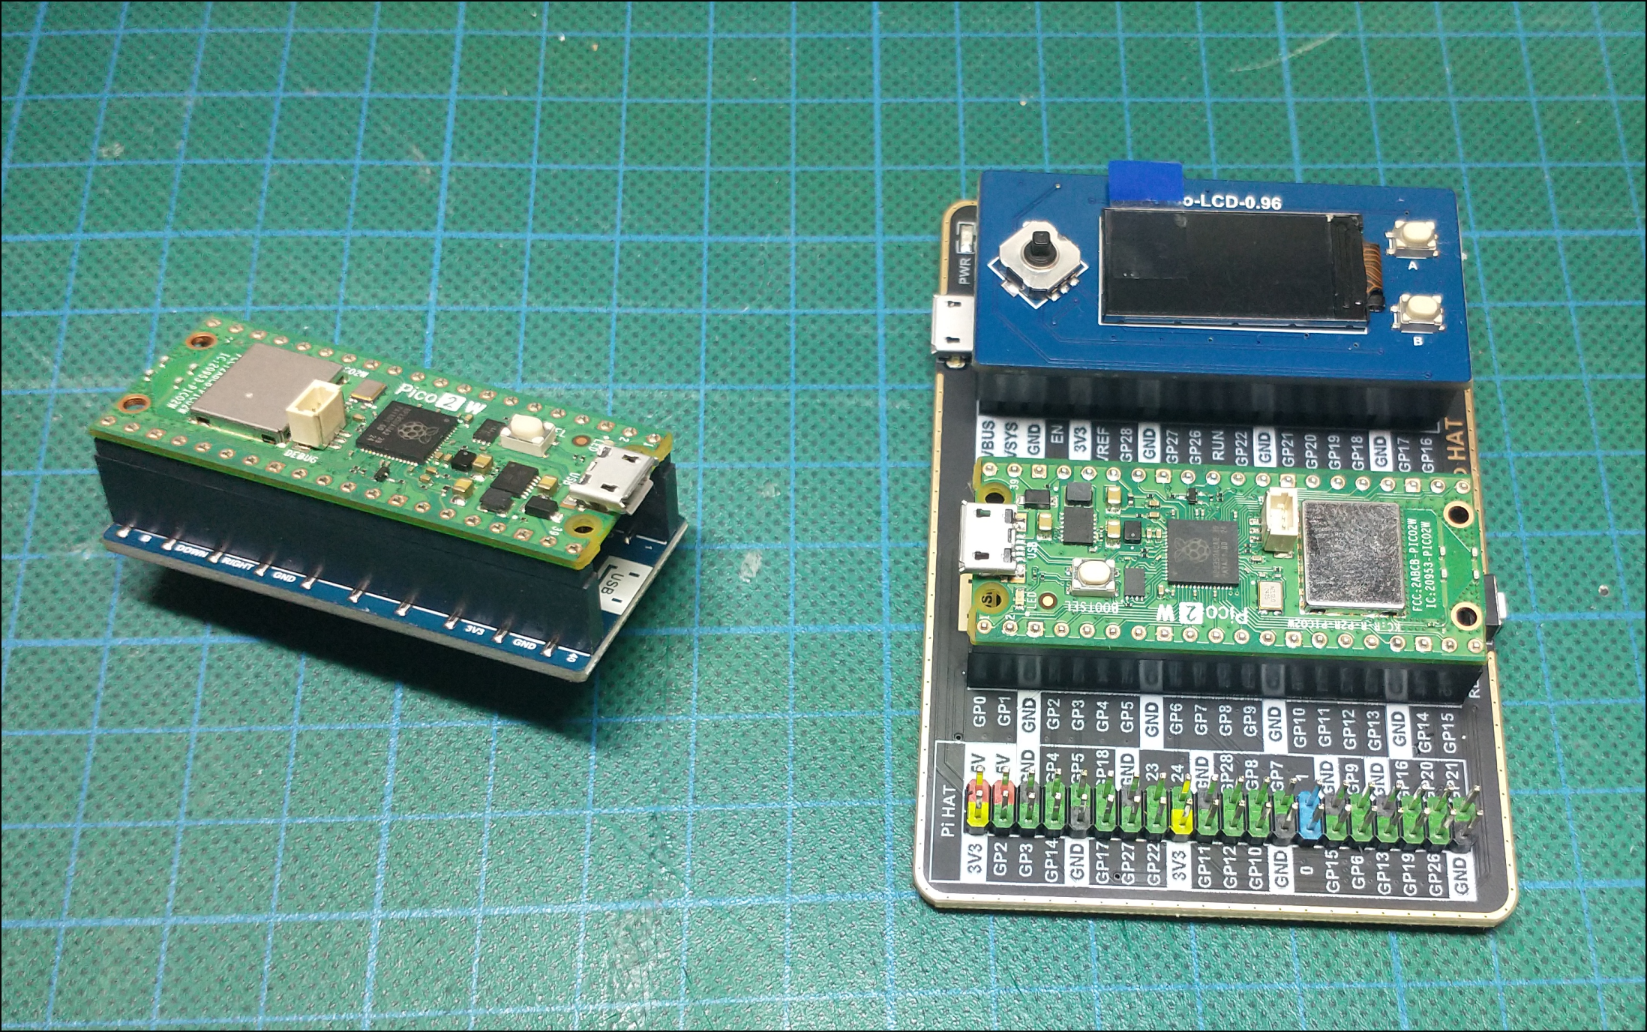
- Rasberry Pico 2 W
- LCD 0.96" Waveshare 19653 screen
- micro usb cable
- M3 inserts (short ones, with 4.2mm outer diameter)
- M3 12mm screws
Tools:
- soldering iron
- PC (no matter Windows PC, Mac, or Linux PC - you just need to be able to install Thonny editor on it)
- 3d printer (access to one will be enough)
Prepare environment for working with Pico
- Download Micropython firmware for Pico 2W (u2f file)
https://micropython.org/download/RPI_PICO2_W/
- Press (and hold) button on Pico then connect it to your computer. Pico should show up exactly as a usb pendrive would.
- Copy the .u2f file onto it. The device will reboot (and it’s storage will disappear from your system). From now on device will be able to run Micropython code.
- Install Thonny (https://thonny.org/).
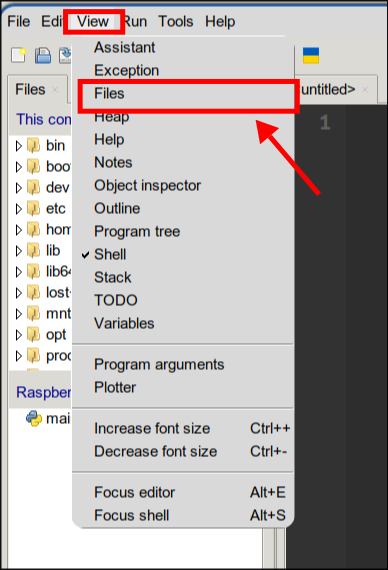
- Launch Thonny. In the “View” menu turn on showing files panel.
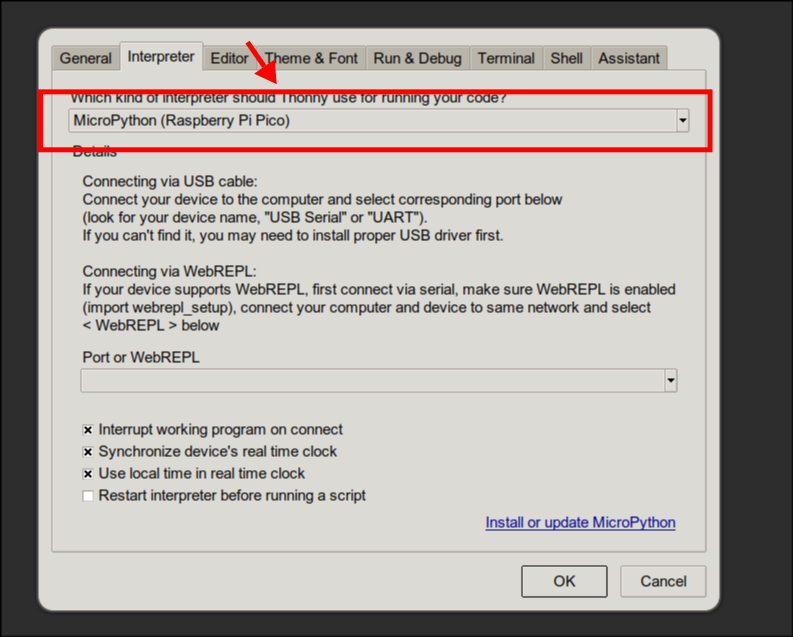
- Go to Tools -> Options -> Interpreter. From the dropdown menu select “MicroPython (Raspberry Pi Pico)”.
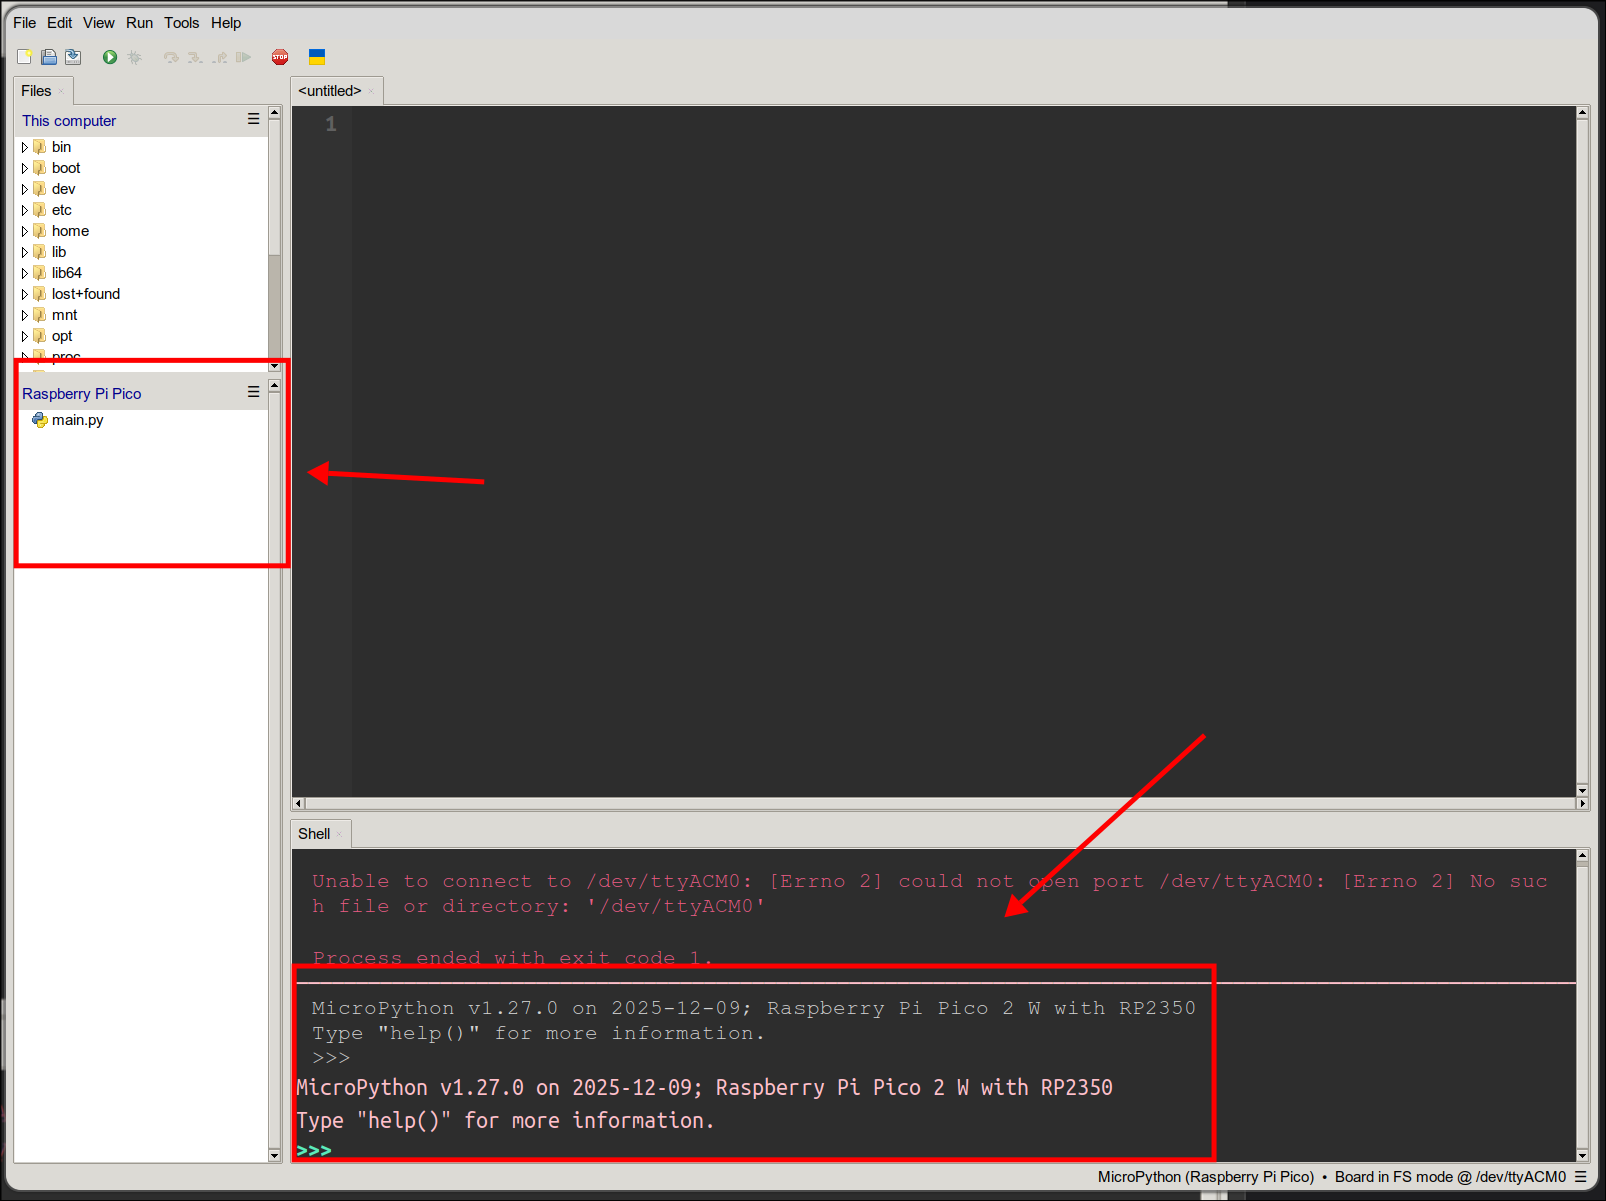
- Editor should now detect the connected Pico - you’ll be able to see it in bottom right corner.
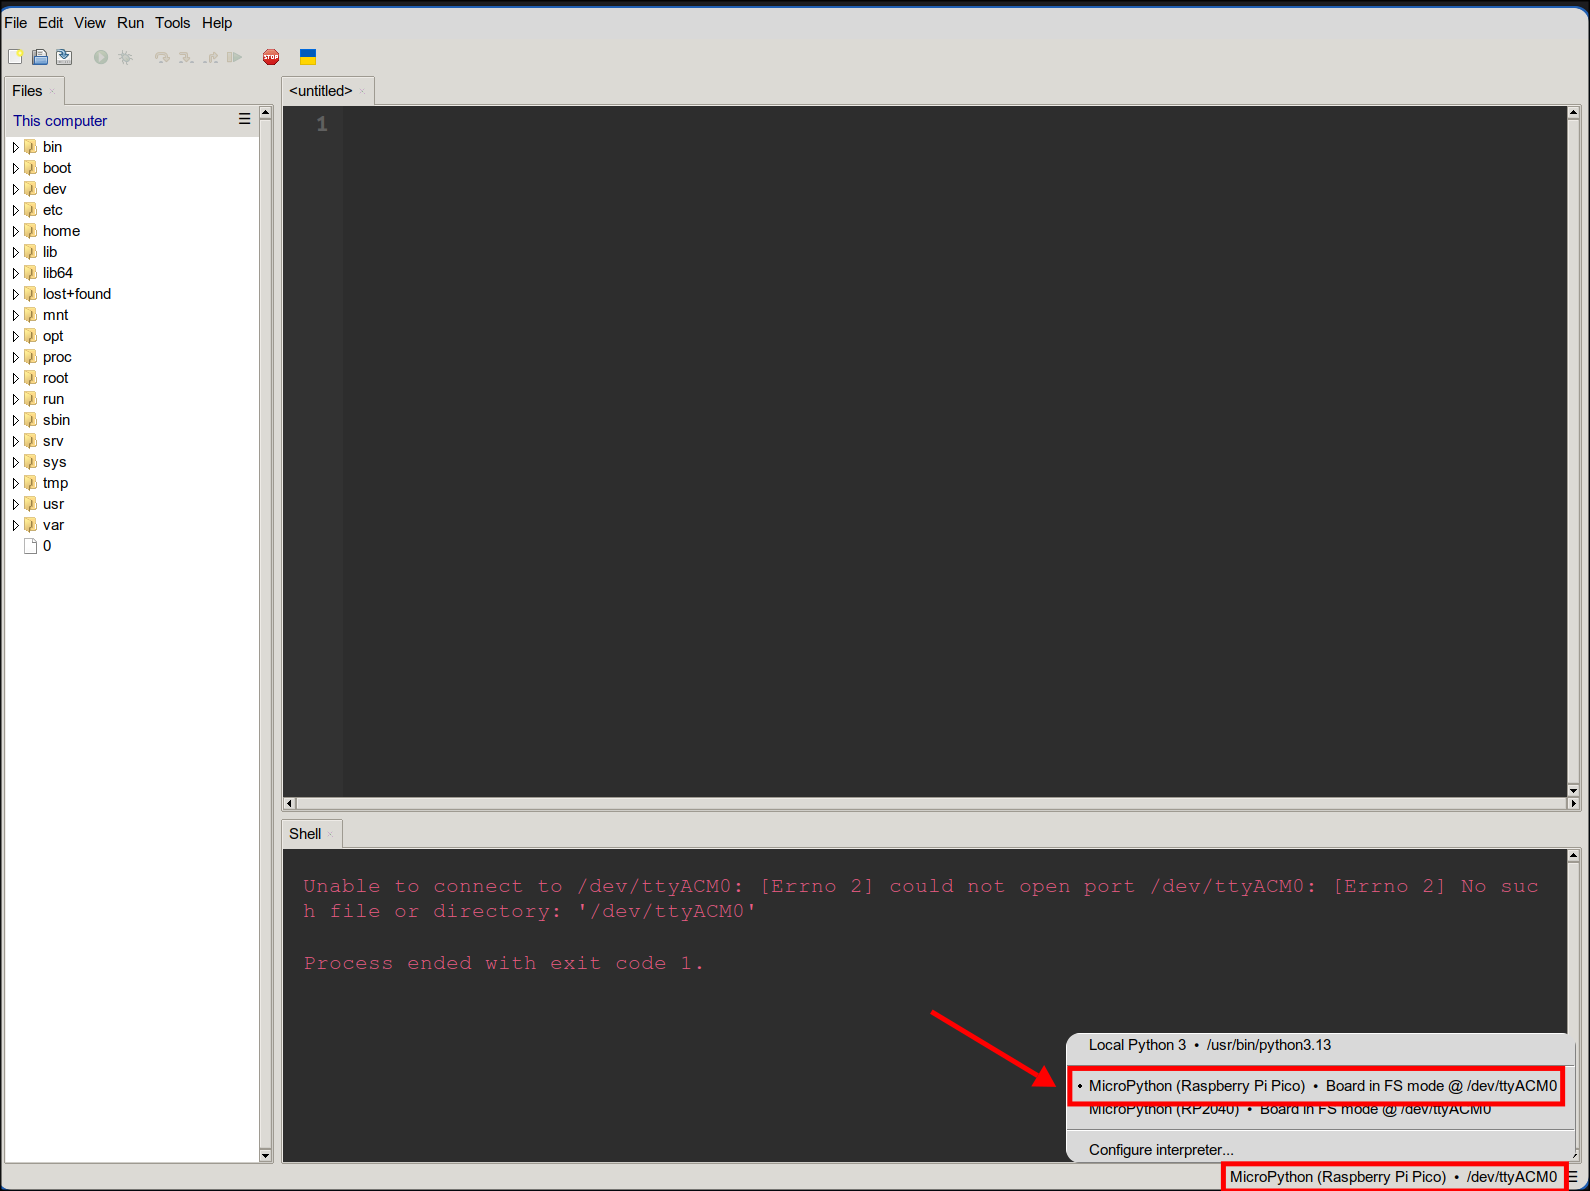
- After selecting Pico in the bottom right corner you should see its storage in the Thonny’s file panel. Also Micropython REPL will be visible in the shell panel.
Connecting the Waveshare 19653 screen
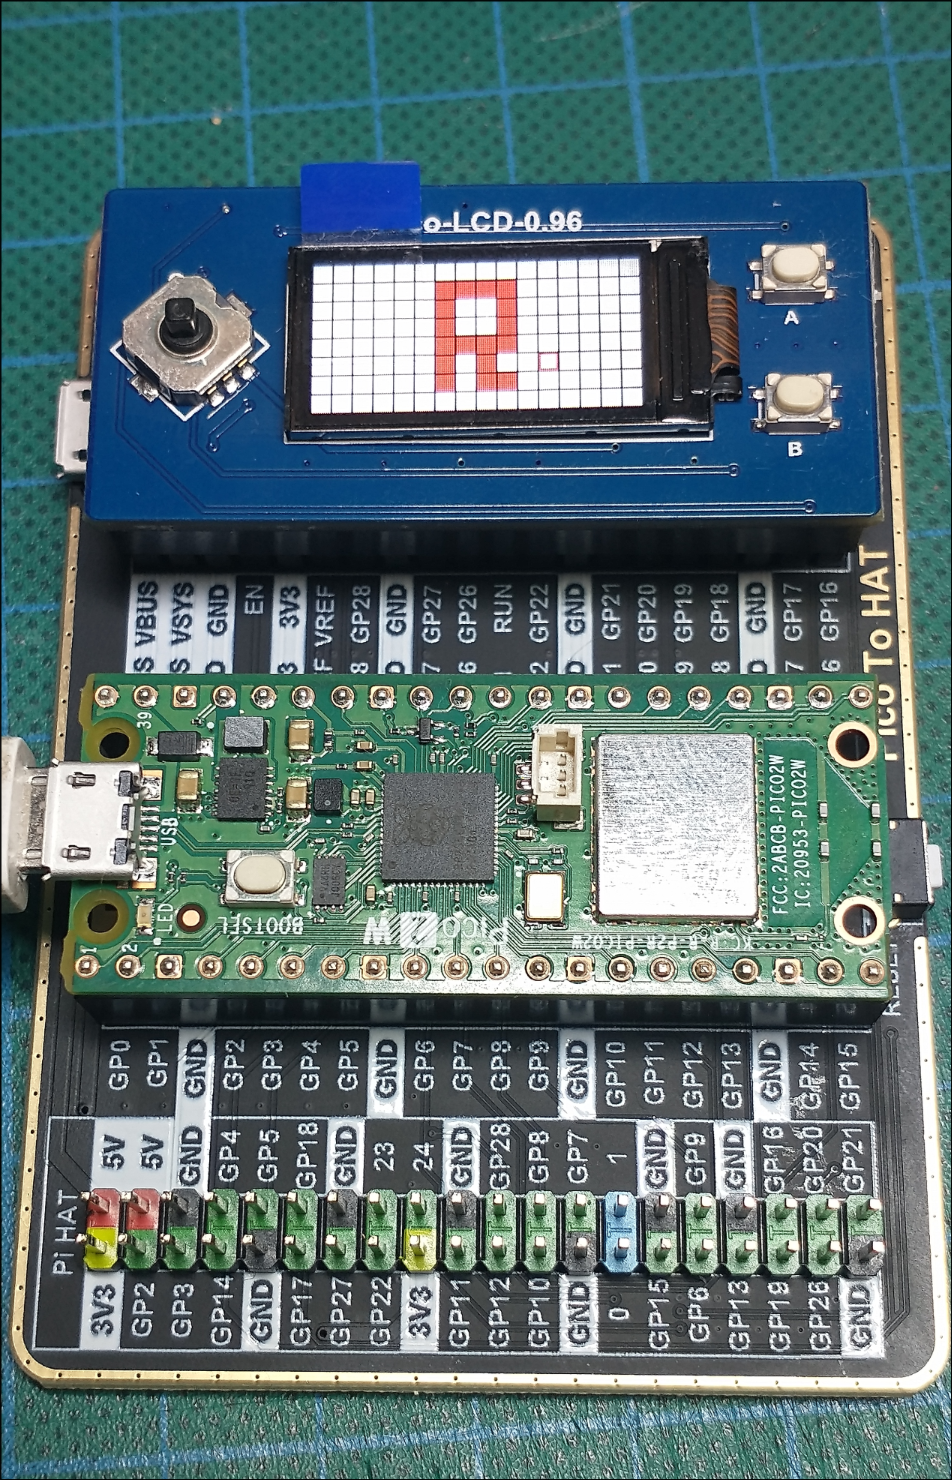
- Assemble Pico and screen (mind the usb location). If you have some sort of expander you can use it during development phase.
- Download software for screen.
https://files.waveshare.com/wiki/common/Pico_code.7z
- Extract .7z archive.
- Locate Pyhon/Pico-LCD-0.96 folder.
- Open
pico-lcd-0.96.pyfile in Thonny. It contains basic functions to control the screen and demo app.
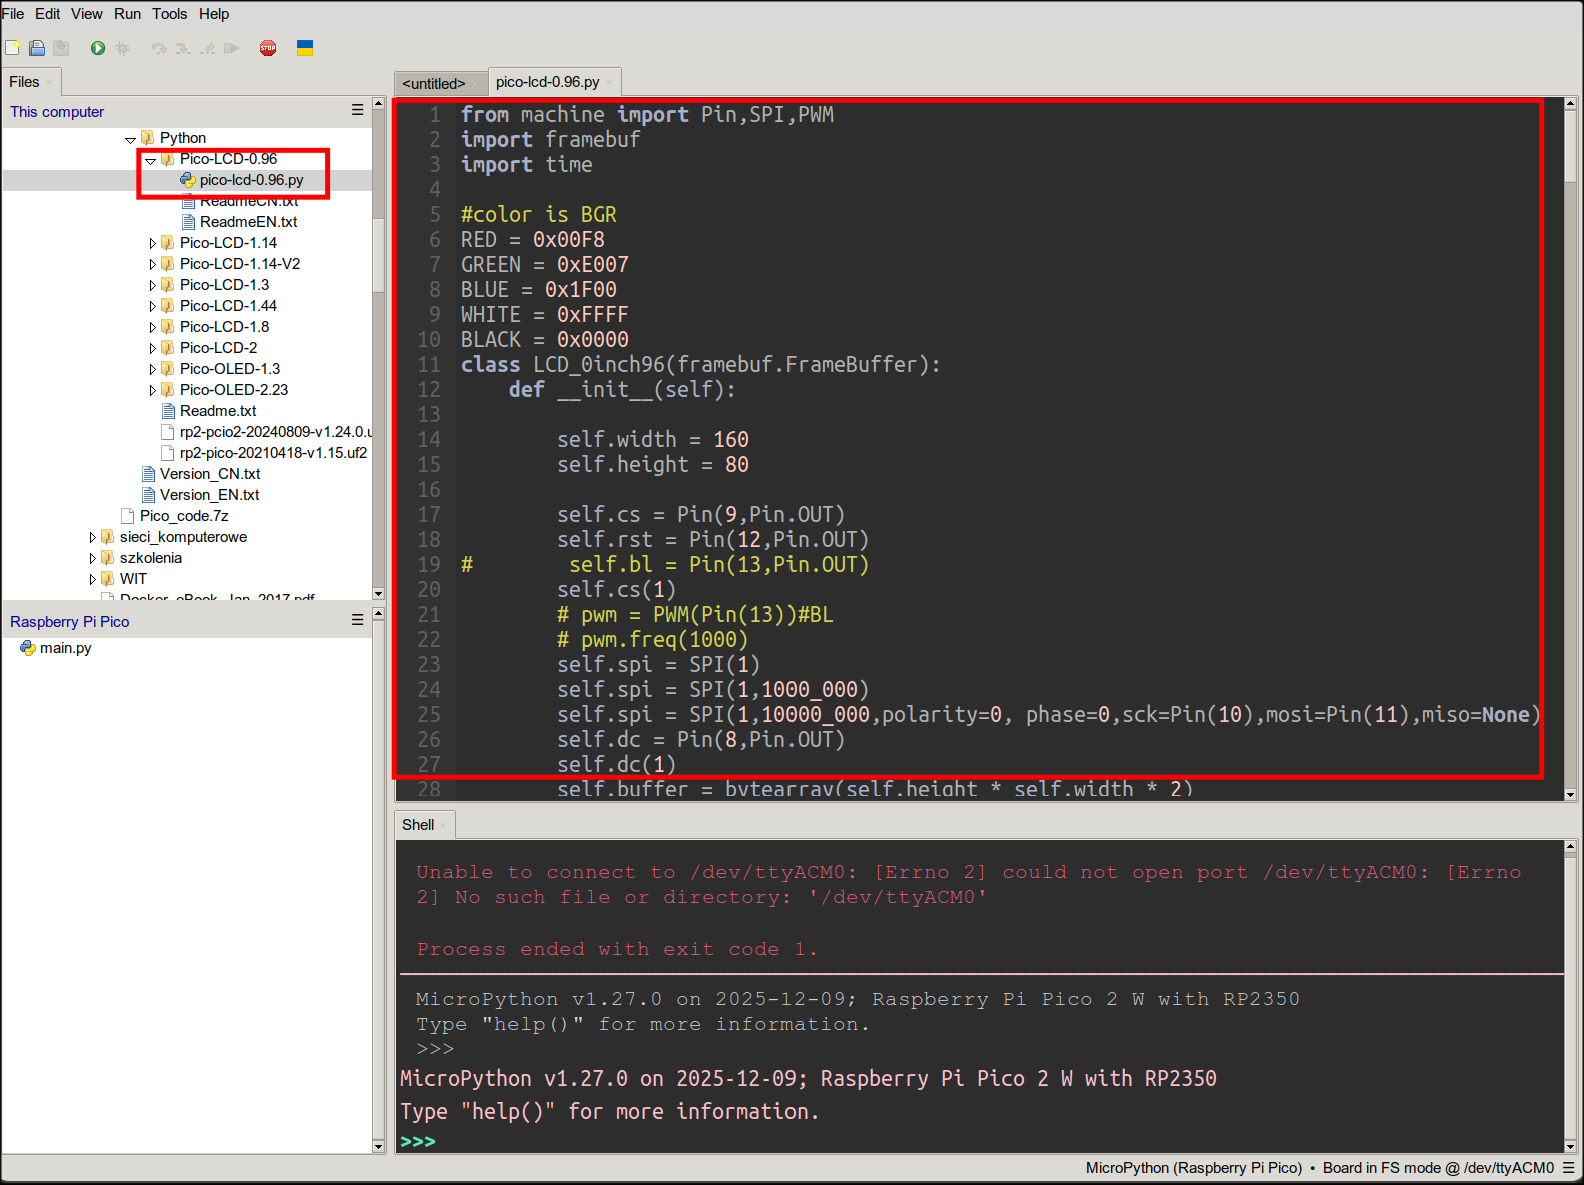
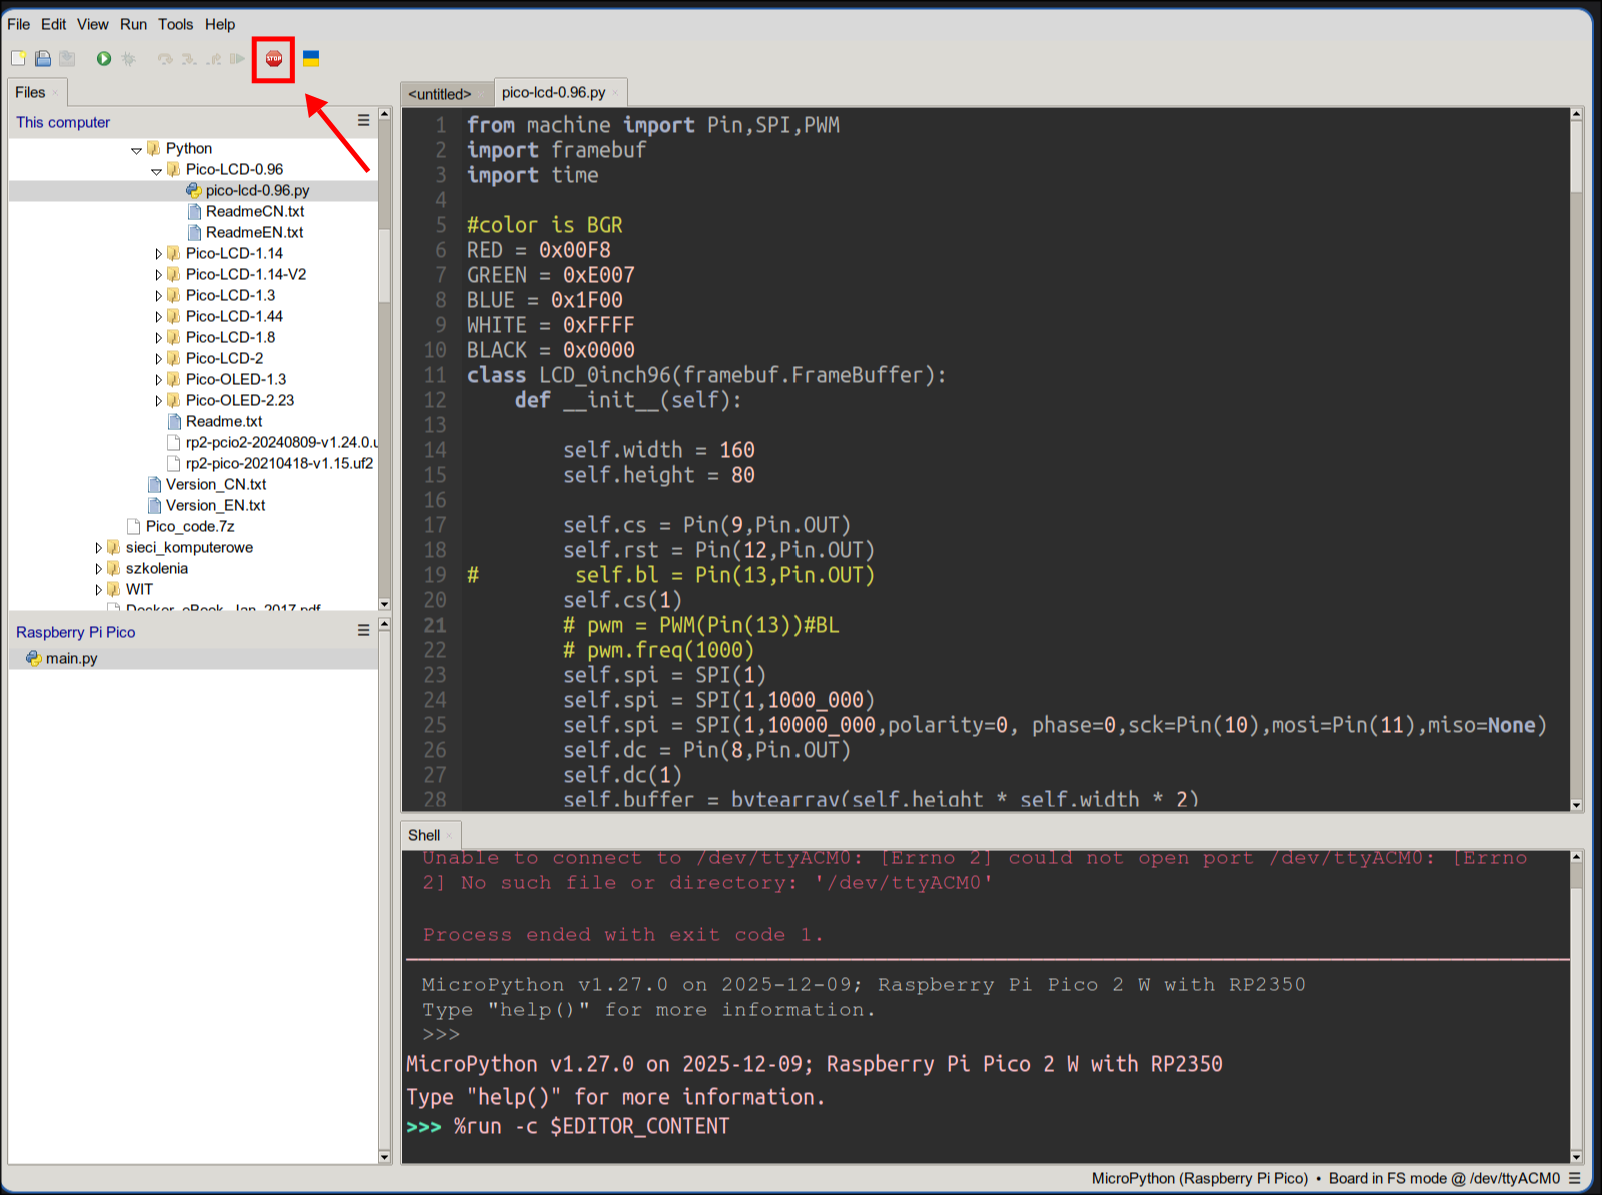
- You can run this sample on the device by pressing “Play” button (when app is contained withing single file you don’t have to copy it to run it on the device).

- You can stop the demo by pressing “Stop” button :D .
- Create
LCD_0inch96.pyfile on the device and paste contents ofpico-lcd-0.96.pyinto it.
Pixela
Pixela service is being used to store data - thus an account is needed. Registration is a bit on a more unusual side as it requires sending http requests directly.
- Create account.
curl -X POST https://pixe.la/v1/users -d '{"token":<PASSWORD>, "username":<USERNAME>, "agreeTermsOfService":"yes", "notMinor":"yes"}'
Swap the <PASSWORD and <USERNAME> for your own values.
If all went well you should see:
{"message":"Success.","isSuccess":true}
- Create graph where the data will be stored.
curl -X POST https://pixe.la/v1/users/<USERNAME>/graphs -H 'X-USER-TOKEN:<PASSWORD>' -d '{"id":"<GRAPH_TITLE>","name":"<GRAPH_TITLE>","unit":"commit","type":"int","color":"shibafu"}'
- You can check your graph in your web browser.
https://pixe.la/v1/users/<USERNAME>/graphs/<GRAPH_TITLE>
- You can insert values with:
curl -X POST https://pixe.la/v1/users/<USERNAME>/graphs/<GRAPH_TITLE> -H 'X-USER-TOKEN:<PASSWORD>' -d '{"date":"<YYYYMMDD>","quantity":"5"}'
- You can read values for a given day with:
curl -X GET https://pixe.la/v1/users/<USERNAME>/graphs/<GRAPH_TITLE>/<YYYYMMDD> -H 'X-USER-TOKEN:<PASSWORD>'
Upload habit tracker code
- Download source files:
https://github.com/Pshemas/habit_tracker
- Copy all .py files to the device.
- Create
.pixelafile and fill it with your Pixela data using this template:
PUT_PIXELA_USER_TOKEN_HERE
PUT_PIXELA_USERNAME_HERE
https://pixe.la/v1/users
PUT_PIXELA_GRAPH_NAME_HERE
- Create
.wififile and enter your wifi details.
PUT_WIFI_NAME_HERE
PUT_WIFI_PASSWORD_HERE
At this point you should already have a working device.
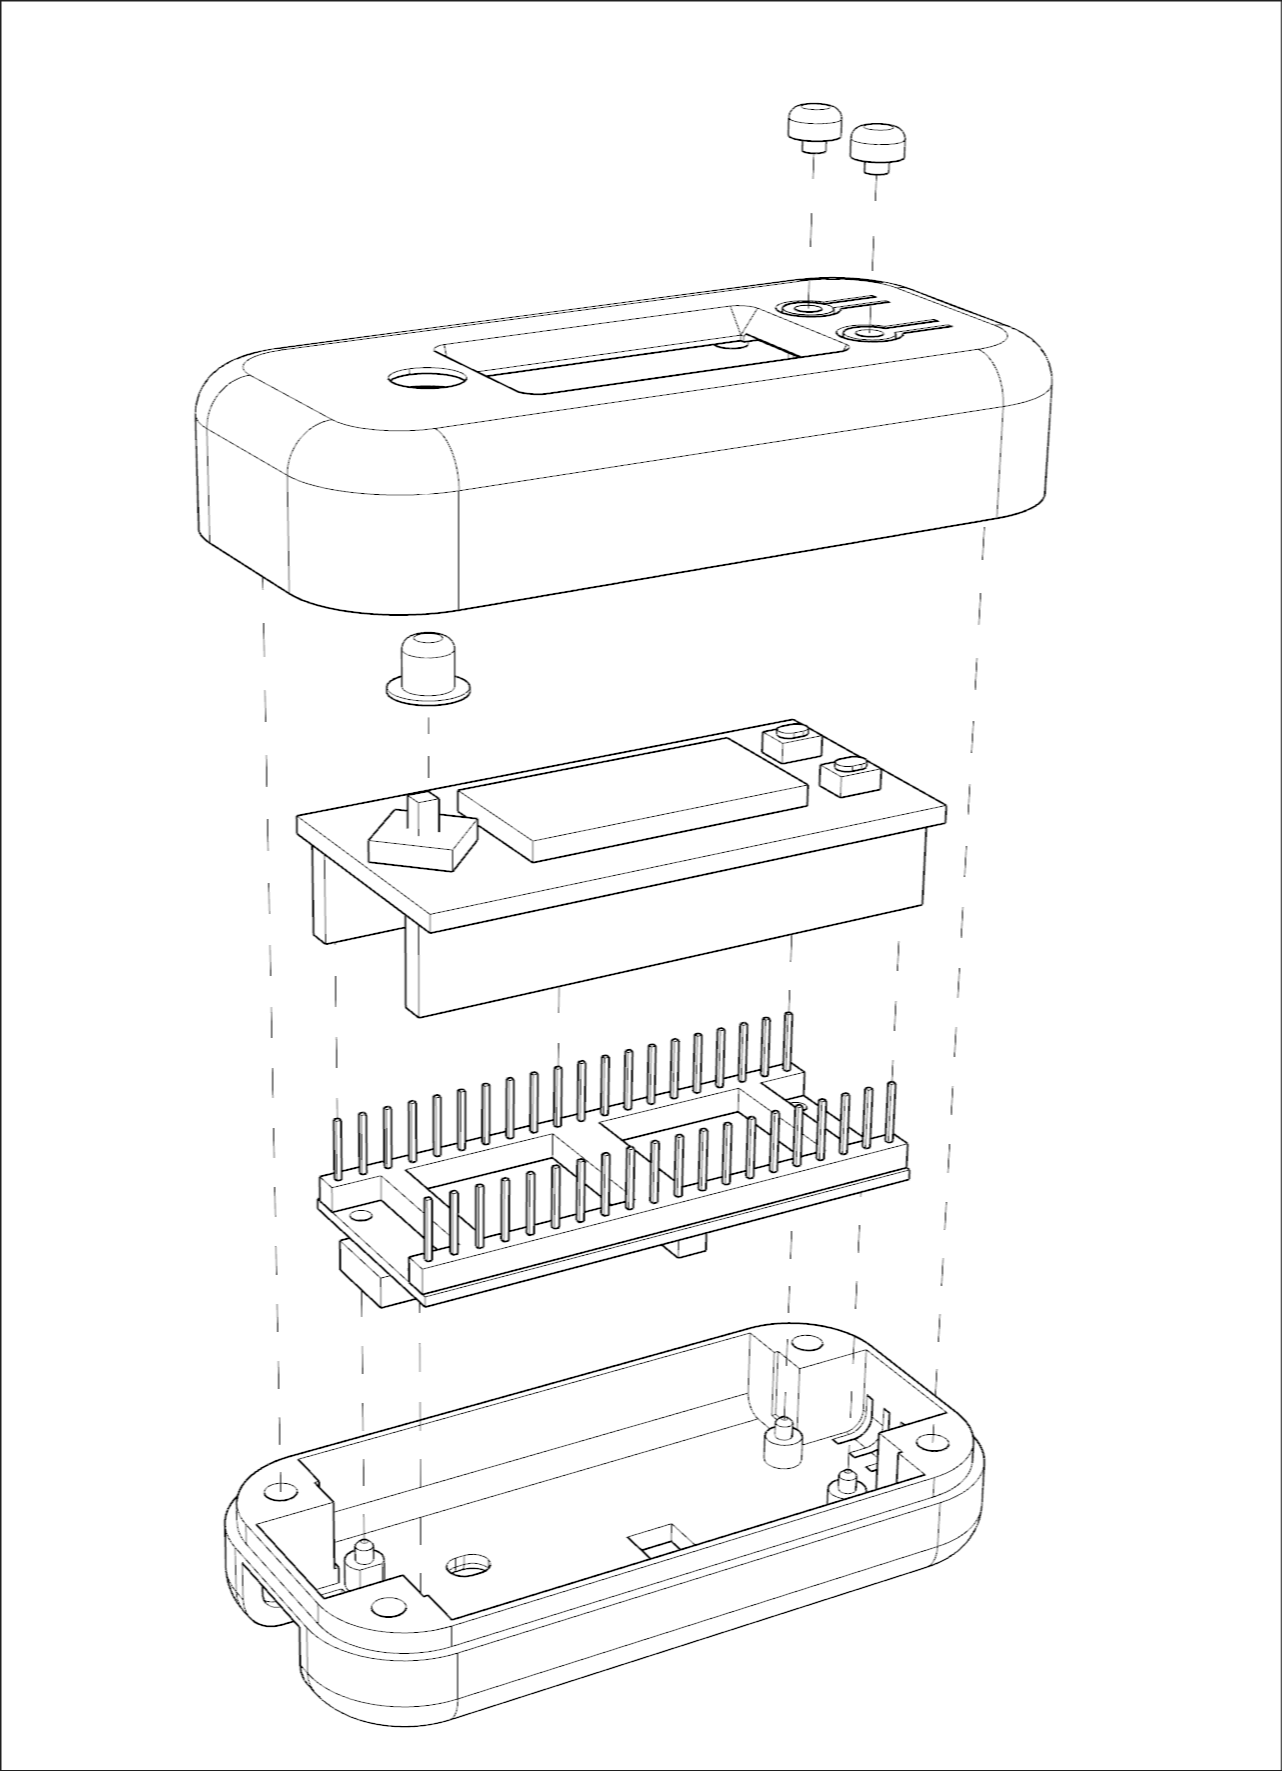
Assembly
- 3d print the case. Archived STEP files are in
case_stepfolder. - Use soldering iron to mount threaded inserts in the upper part of the case.
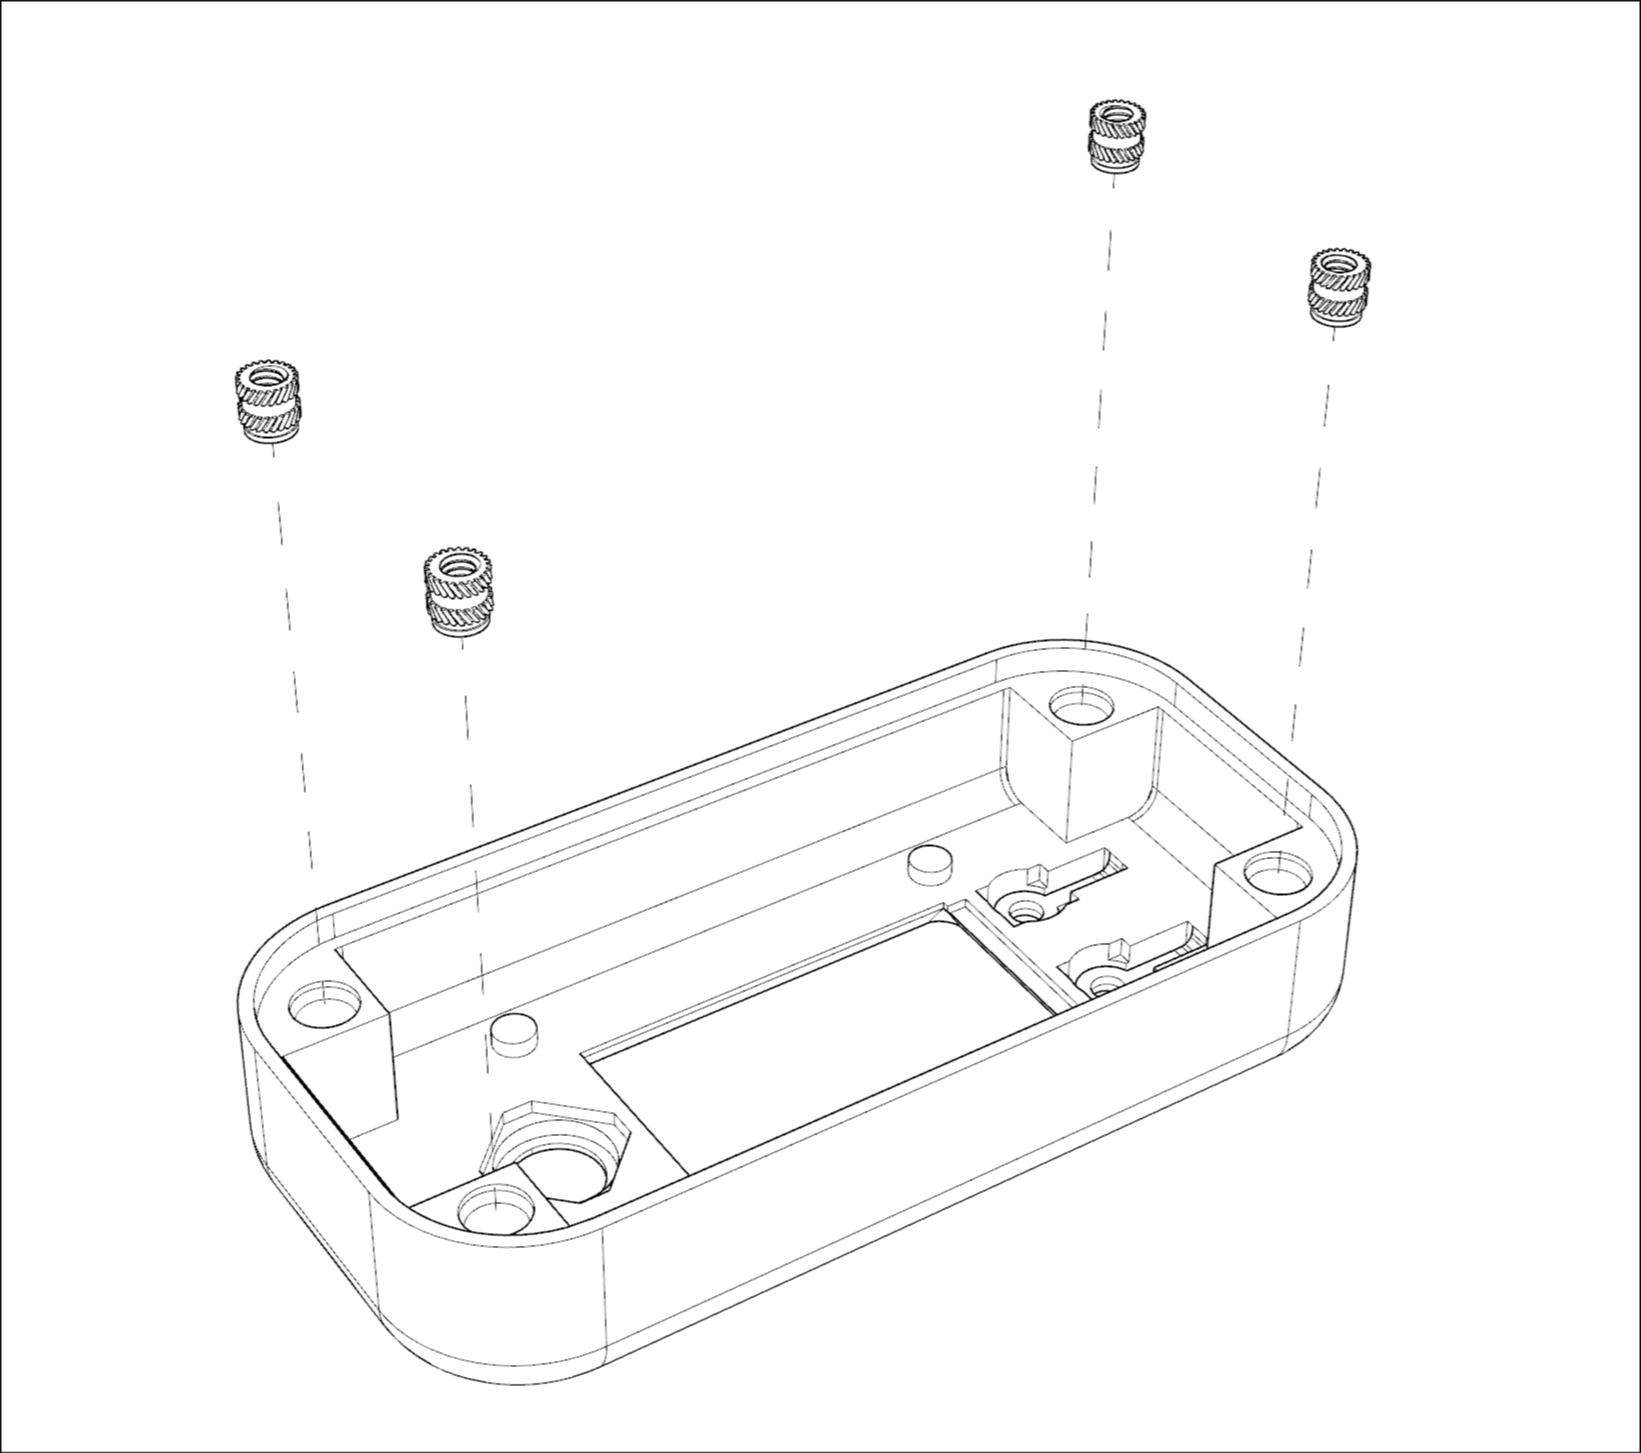
Provided design will work with short M3 inserts, with 4.2mm outer diameter.
- Glue the small buttons onto the top part of the case.
- Insert Pico with screen into bottom part of the case.
- Put the button cap on joystick.
- Add top cover and screw the halves together with M3 12mm screws.
![]()
… done :) .
Tweaks
As mentioned code is not meant to be clean. It should be readable (hopefully) by people that don’t code much. It contains some things that are meant to be improved by workshop participants.
Some ideas:
- don’t like the colors? Change them. You’ll find some optional colorsets and function to translate regular RGB to format required by the screen in
colorset.pyfile. - the app has some hardcoded messages in Polish. Try translating them.
- when the app encounters an error you get a message on the screen. That’s it. Consider mapping one of the buttons to
machine.reset()when error occurs. - sometimes hitting the button won’t register +1 in Pixela. That’s due to limitation of free Pixela accounts - it drops 25% of requests. Function that pulls data has 5 retries to combat that - try adding that to send function.
- would you like a different ui layout, with more squares? Think how to tweak draw functions and what kind of changes data structures will require?